
SANDBOX PRODUCTION
E-Invoice has two modes: Sandbox for testing and learning, and Production for official submission to LHDN.

The Two Modes of E-Invoice
Sandbox
Usage: For testing and practice
Function: Helps businesses familiarize themselves with E-Invoice operations and processes in advance
Production
Usage: For official E-Invoice implementation
Function: Submits data to LHDN as per regulations
How to Set Up Two Modes in SQL
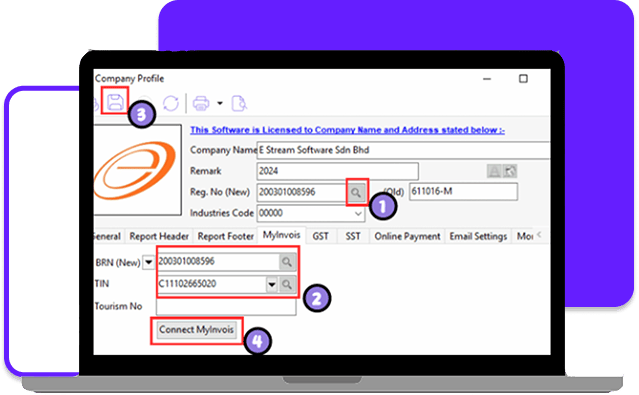
Click the magnifying glass icon to search for the company Reg. No
The system will automatically update the company’s BRN No. and TIN No
Click the Save icon to save the company details
Click Connect MyInvois
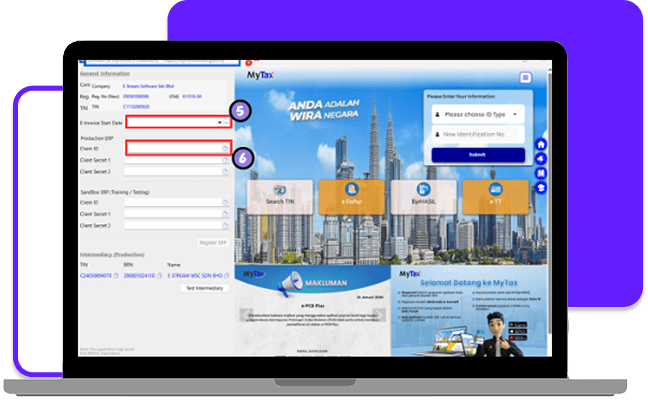
Click the three dots icon, select the company’s actual e-invoice start date, or enter the date manually
Set the actual invoice implementation start date so you won’t need to set it again in the future.
Reminder: The system will prompt you to switch to Production mode one week before the implementation date for a smooth transition!
When you click the Client ID for the mode you want to set, the system will redirect to the corresponding LHDN website page
You can also verify the correct website through the link shown in the system
Production: myinvois.hasil
Sandbox: preprod.myinvois.hasil
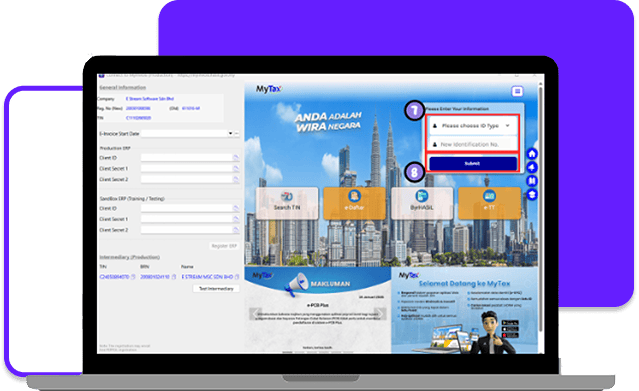
Click Identification Card No. and enter the Director’s ID number
Click Submit, then enter the password to verify your identity
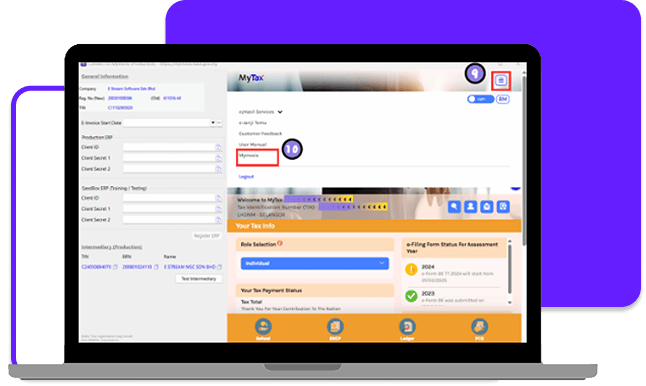
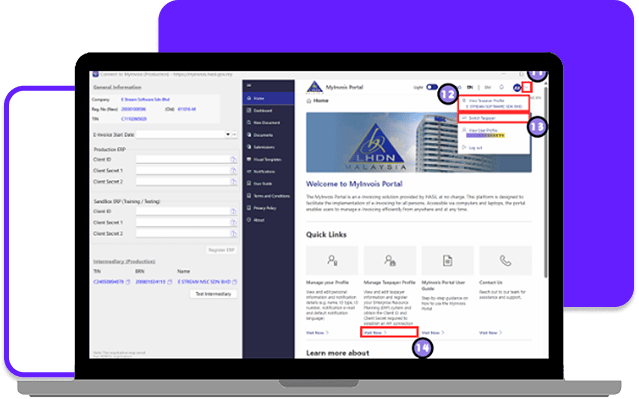
Click the Menu icon in the top right corner
Select the MyInvois option
Click the downward arrow in the top-right corner
If the taxpayer information matches your company name, click View Taxpayer Profile
If the information doesn’t match, click Switch Taxpayer and select the correct company name
In Manage Taxpayer Profile, click Visit Now.
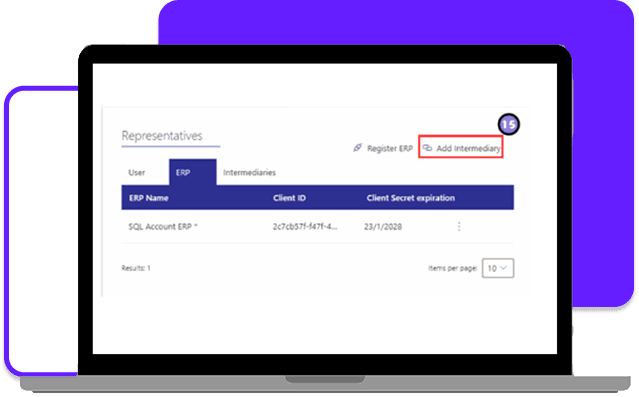
A. How to Add an Intermediary
After entering the page, scroll to the bottom
Click Add Intermediary
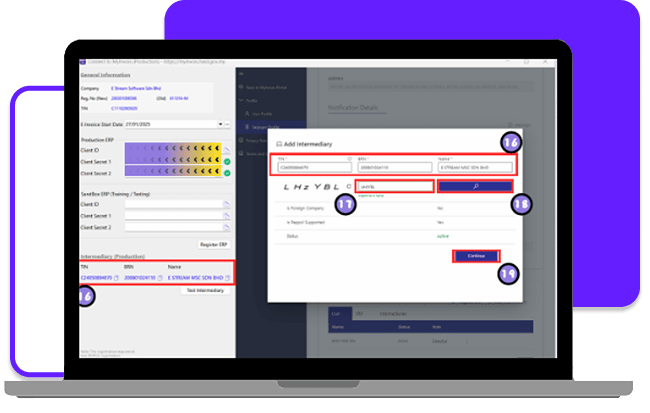
In the SQL system, you can copy TIN, BRN, and Company Name into the designated fields for quick entry and verification
- Fill in the designated fields accurately using the letter codes (CAPTCHA) provided by LHDN
- Click the search icon
- Click Continue
Enter today’s date in the Representation From
Leave the Representation To date blank to prevent expiration
Turn on all permissions to ensure the system functions properly
Click Add Intermediary
B. How to Add an ERP System
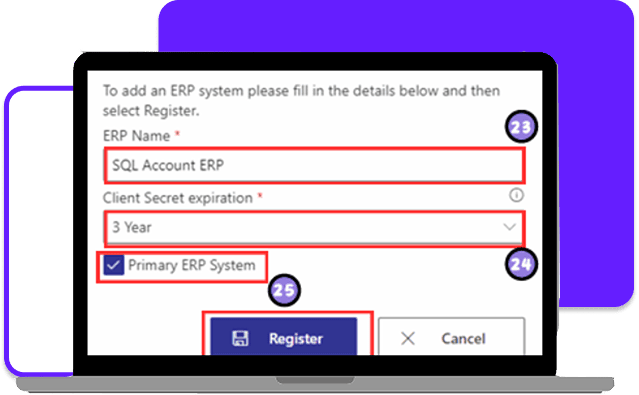
ERP Name: SQL Account ERP
Select 3 Years for the Client Secret Expiration period
Tick Primary ERP System
Click Register
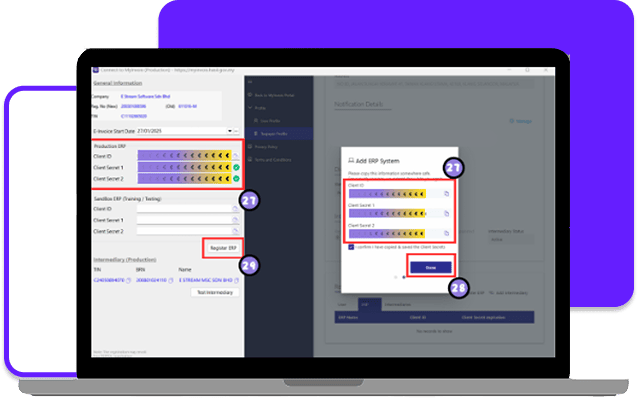
Copy the Client ID, Client Secret 1, and Client Secret 2 generated by LHDN and paste them into the corresponding columns in the SQL system
Tip: When you click the copy button, the system will automatically paste the values into the corresponding columns!
Click Done to close the page
Click Register ERP, and the system will require you to log in again to link to Production mode
Congratulations! You have successfully linked to the e-Invoice Production mode!
The setup steps for Sandbox mode are the same as Production mode, only the website link is different!
Share This Page
Share
Tweet
Related Posts